
Creating Interactive Lapbooks: A Complete Guide
Have you every heard of lapbooks and wondered what exactly is a lapbook? What is the purpose of a lapbook? How can I help my children make a lapbook?
Well, here are all the answers to your questions and how lapbooks are a simple yet exciting way for children to learn more about any subject they are interested in!
What is a lapbook?
A lapbook is simply an interactive book that children of all ages can make on any subject. They are called lapbooks because they can sit in a child’s lap and be flipped through many times!
If you want to learn more about lapbooks, read my other post about how they are a great addition in your homeschool journey! And this post where I share some of my lapbook kits on many different books and holidays.
Lapbooks can be created based off a novel the child has read, a time period in history, a person they are learning about, or even something cool in science! The possibilities are endless. Children love to go back through their lapbooks and re-read the information they have collected.
Perfect for sensory and visual learners, these hands-on interactive books are an exciting way to make learning fun. Children can really be creative with what elements they are adding to their lapbook and how they put it all together. They can dive deeper and do their own research on certain subjects and make elements of their own that show how they are applying all that they are learning!
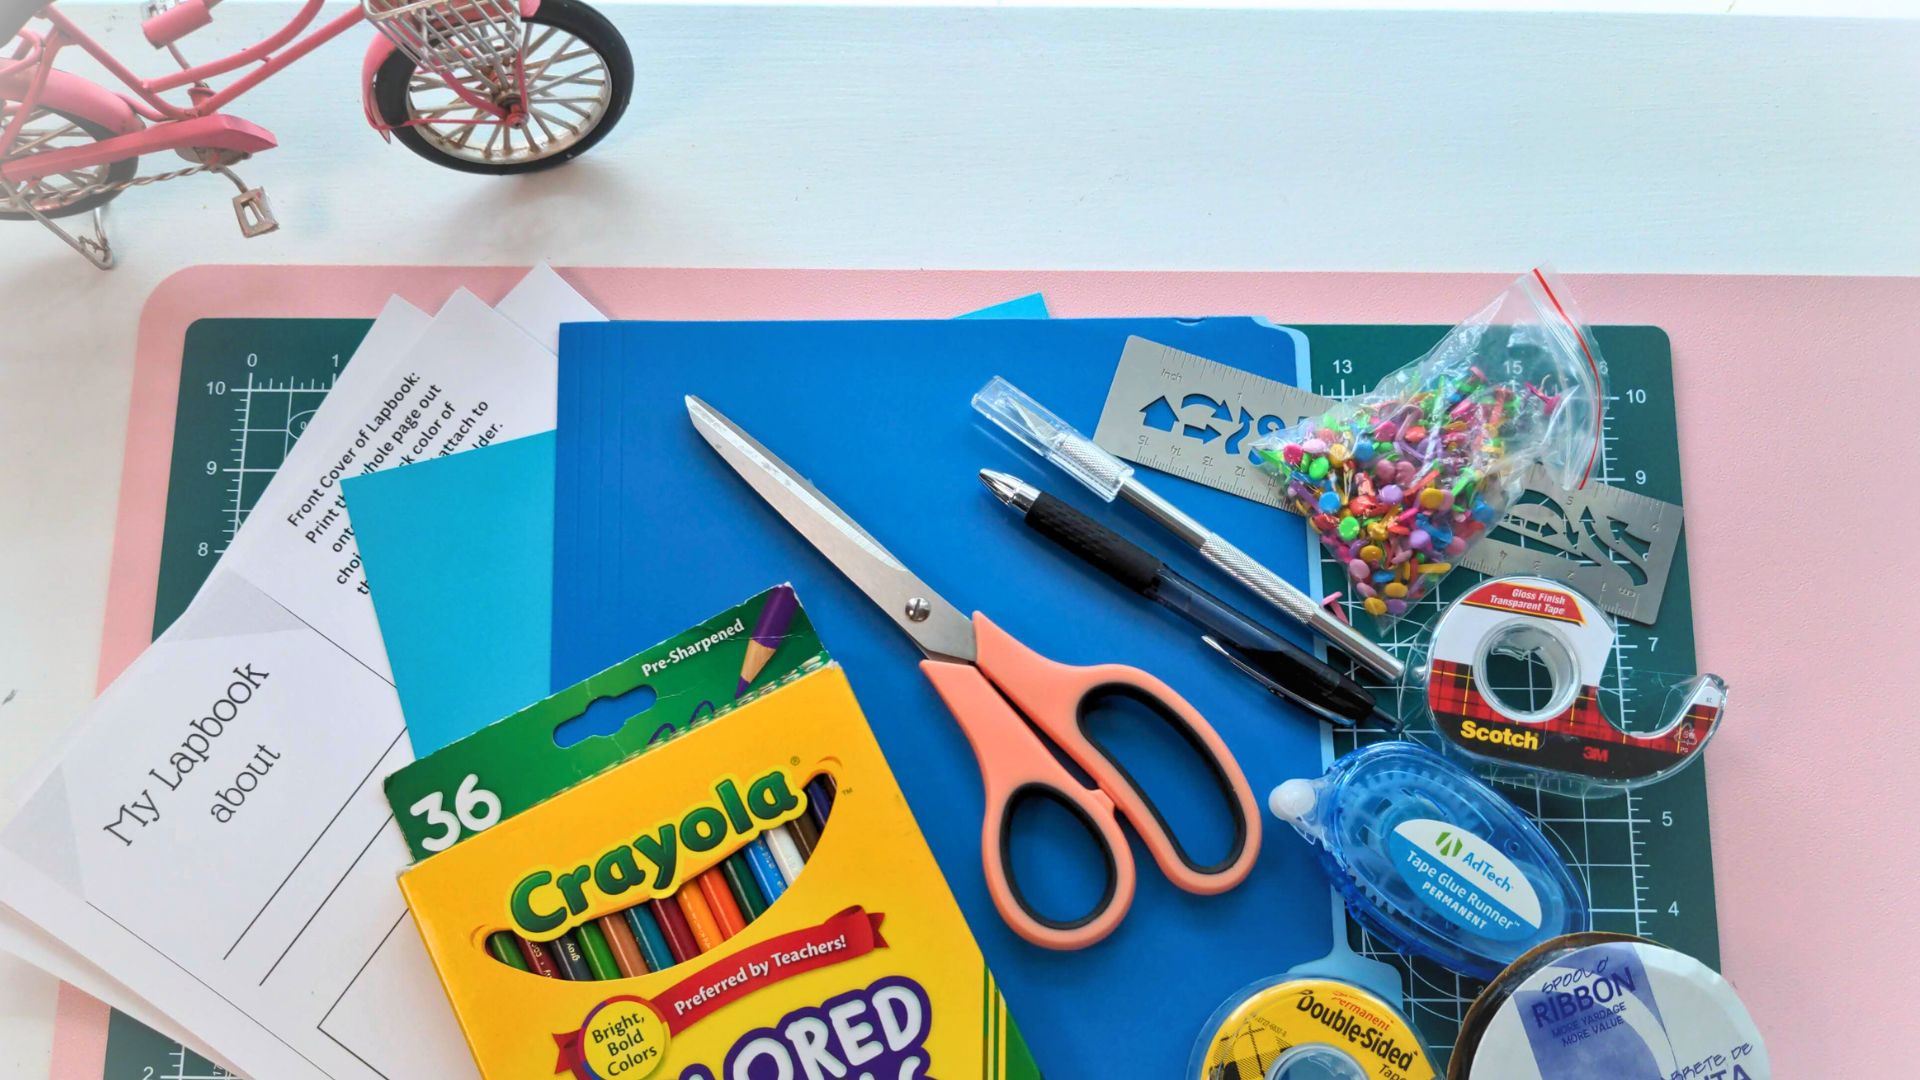
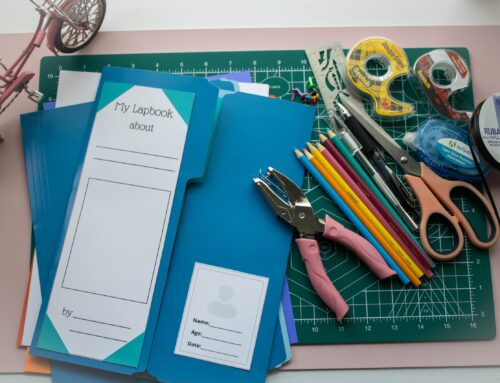
Supplies needed to make a lapbook
")
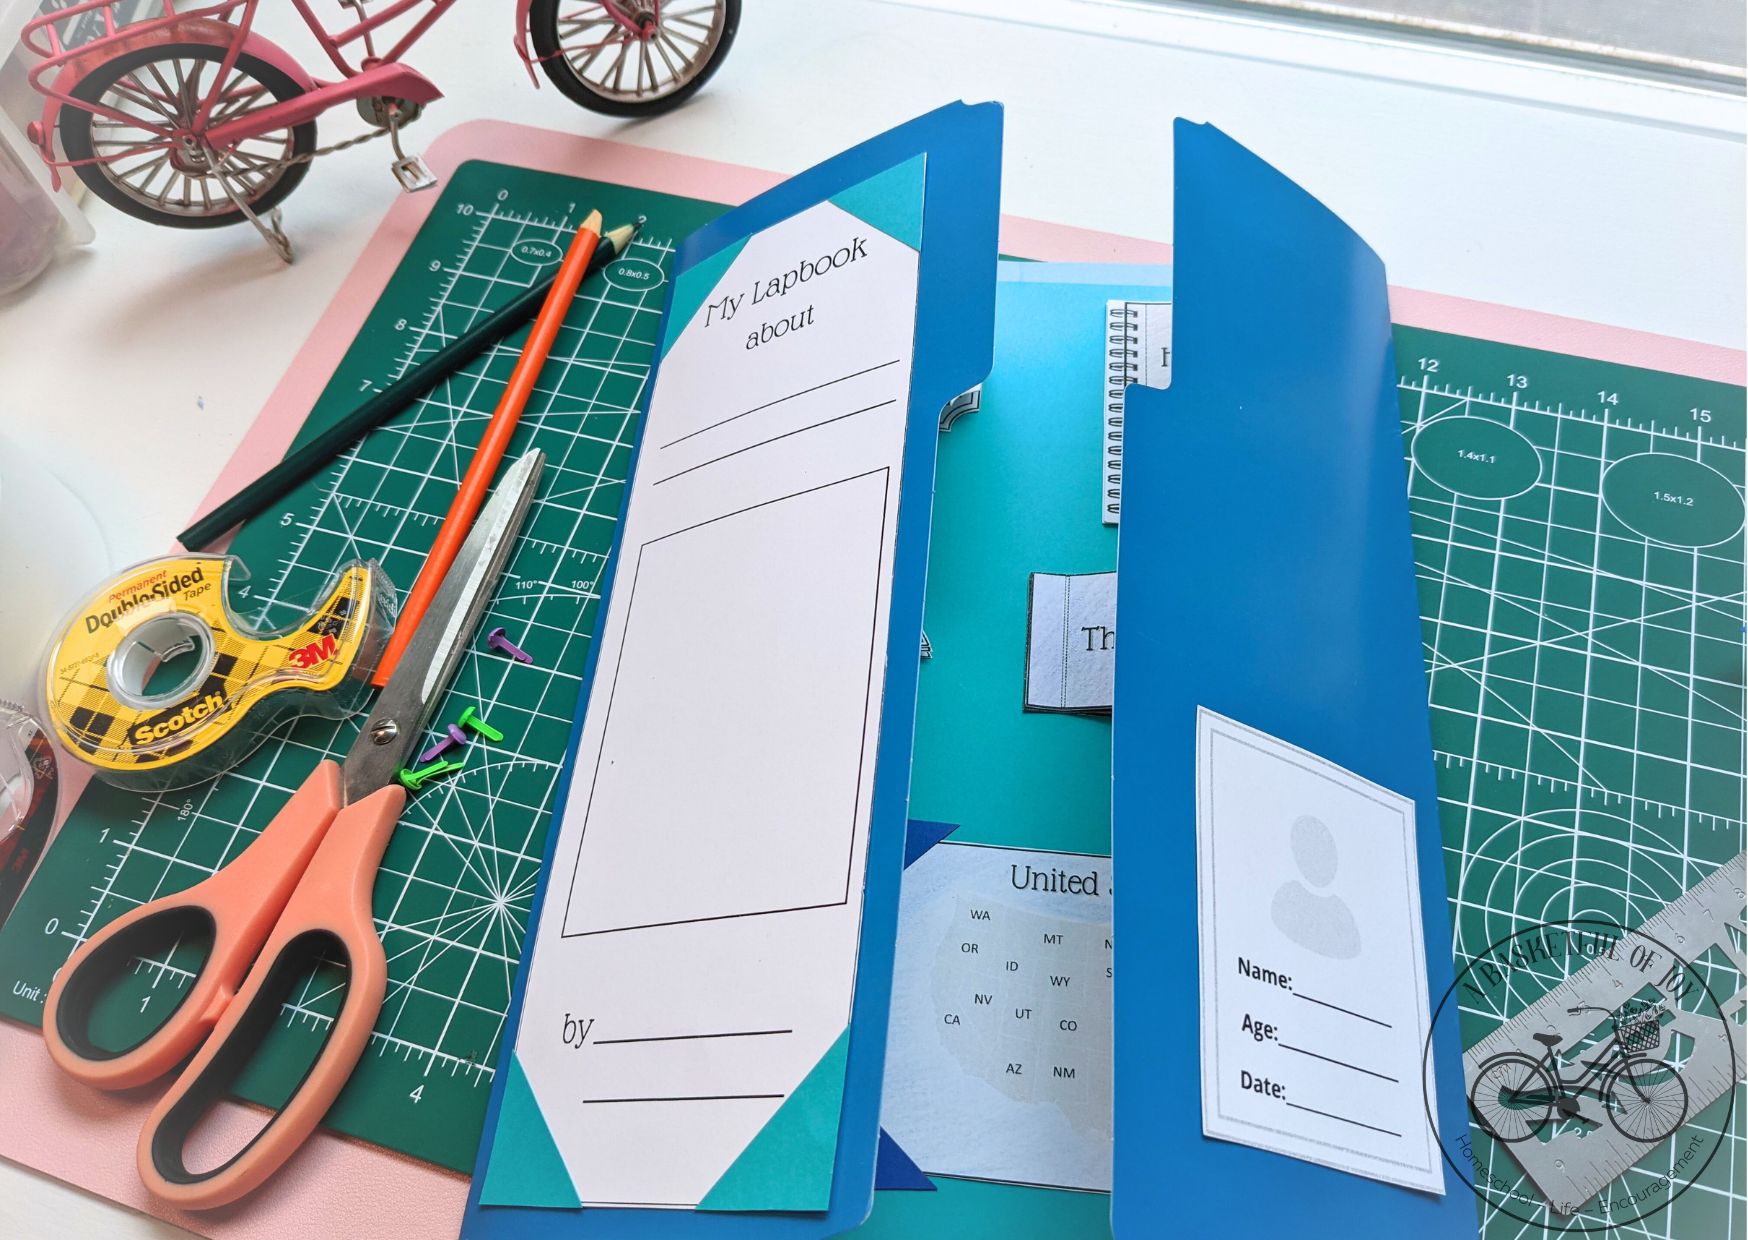
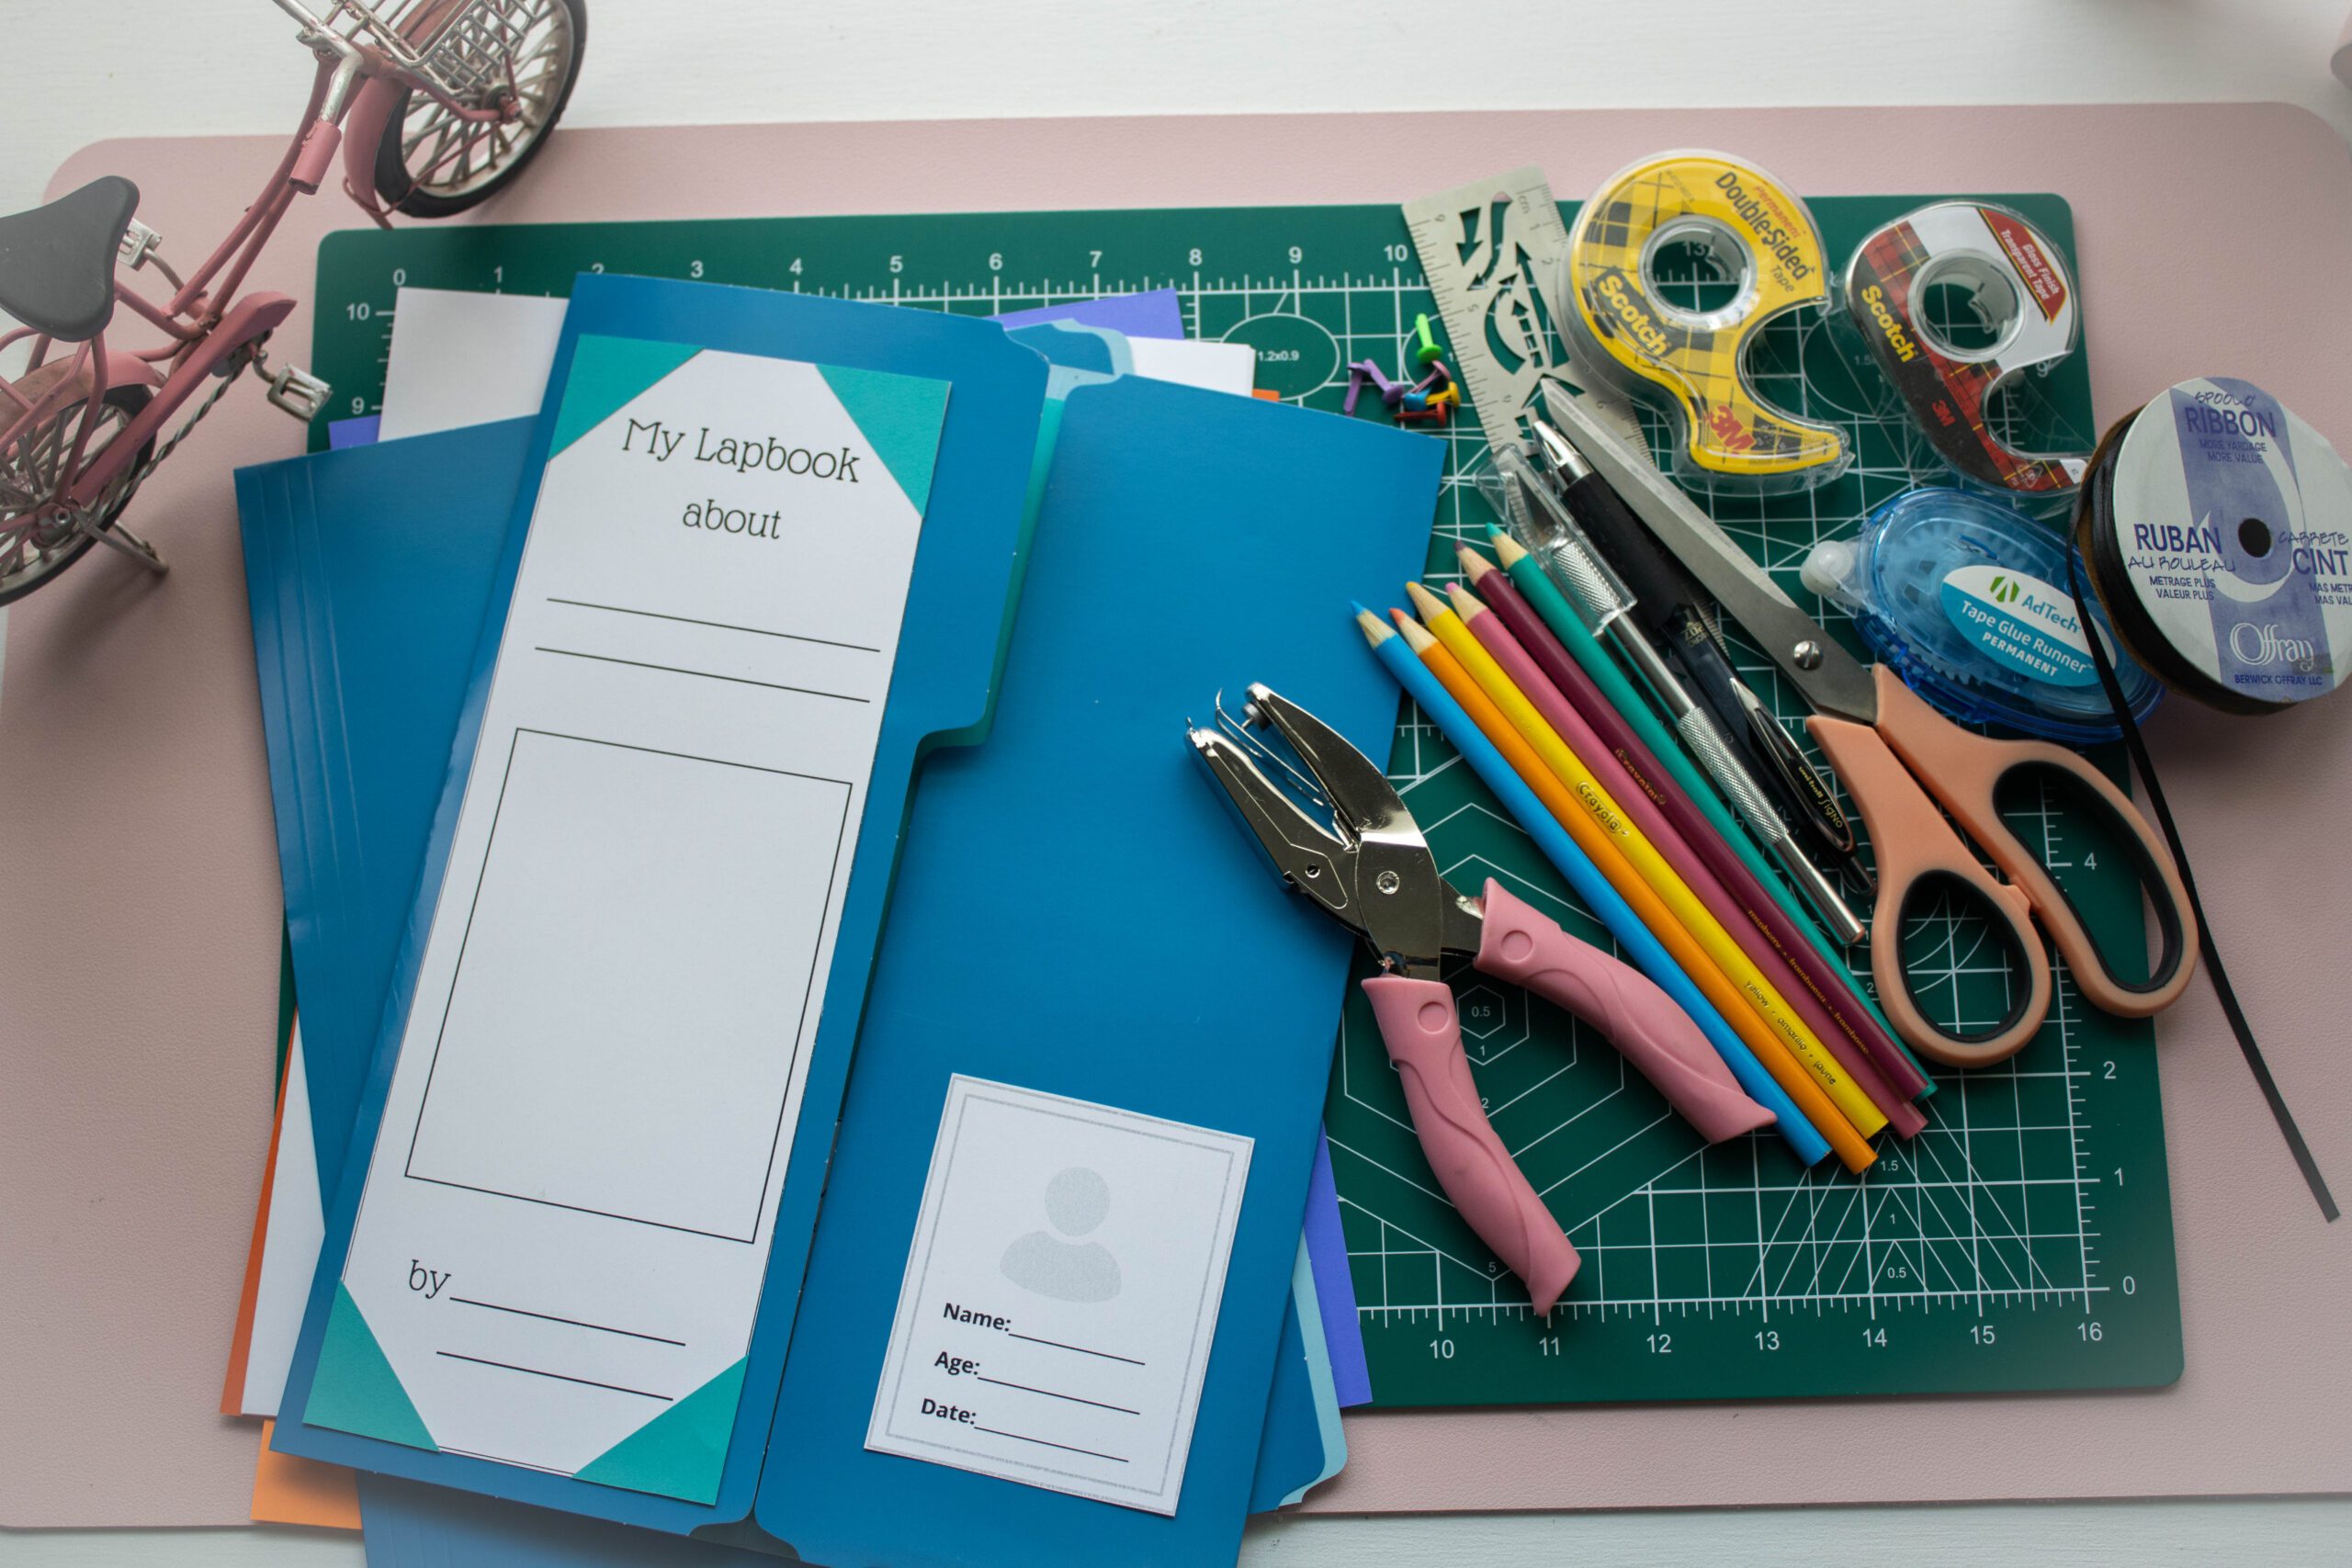
How to make a lapbook base
")
")
Here are a few different ways you can make a lapbook:
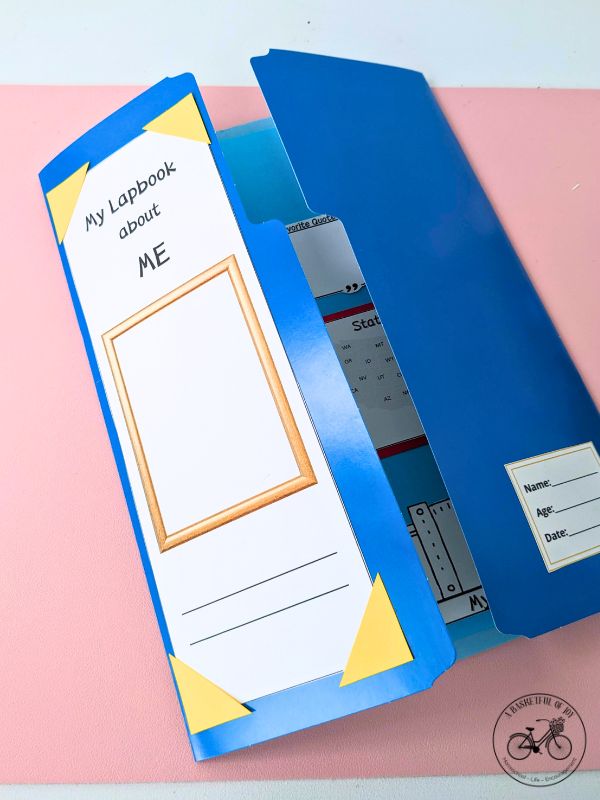
File folder lapbook: Start with a simple paper file folder and lay it flat. Then take the sides and fold them inward to the center original fold. You should now have two doors to your lapbook. To add support to the lapbook, tape a piece of card stock to the back of the lapbook over the original fold. All the elements are attached to this with double stick tape or glue tape or just a glue stick!
Double file folder lapbook: This lapbook is just two file folders, folded like described above and attached at the side to make a bigger lapbook. Many times students find that they have much more information they would like to add to their lapbook, so making it bigger this way is simple!
Cardstock lapbook: Simply tape two or more pieces of cardstock together to create a book. This can function much like a file folder lapbook, but just fold like a normal book. OR it can be folded just like a file folder lapbook. These are simple two file folders folded like described above and attached at the side to make a bigger lapbook. Many times students find that they have much more information they would like to add to their lapbook, so making it bigger this way is simple!
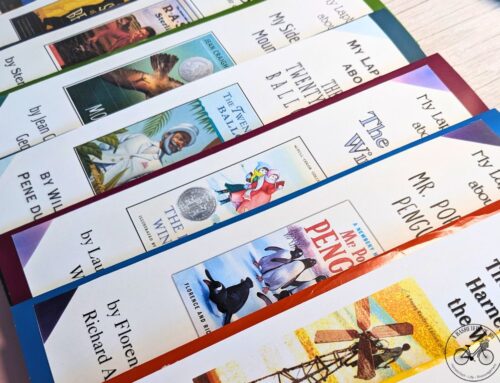
Cardstock half page lapbook: I have also made lapbooks smaller and used two sheets of card stock and either folded them in half to make a four page lapbook or cut them and used packaging tape to make a seam. I also have reinforced the edges with packaging tape as well. This kind of lapbook is a four page lapbook and is the size of a book. I like adding pockets for book reports to the back of these as well. These lapbooks are still some of my favorites to make.
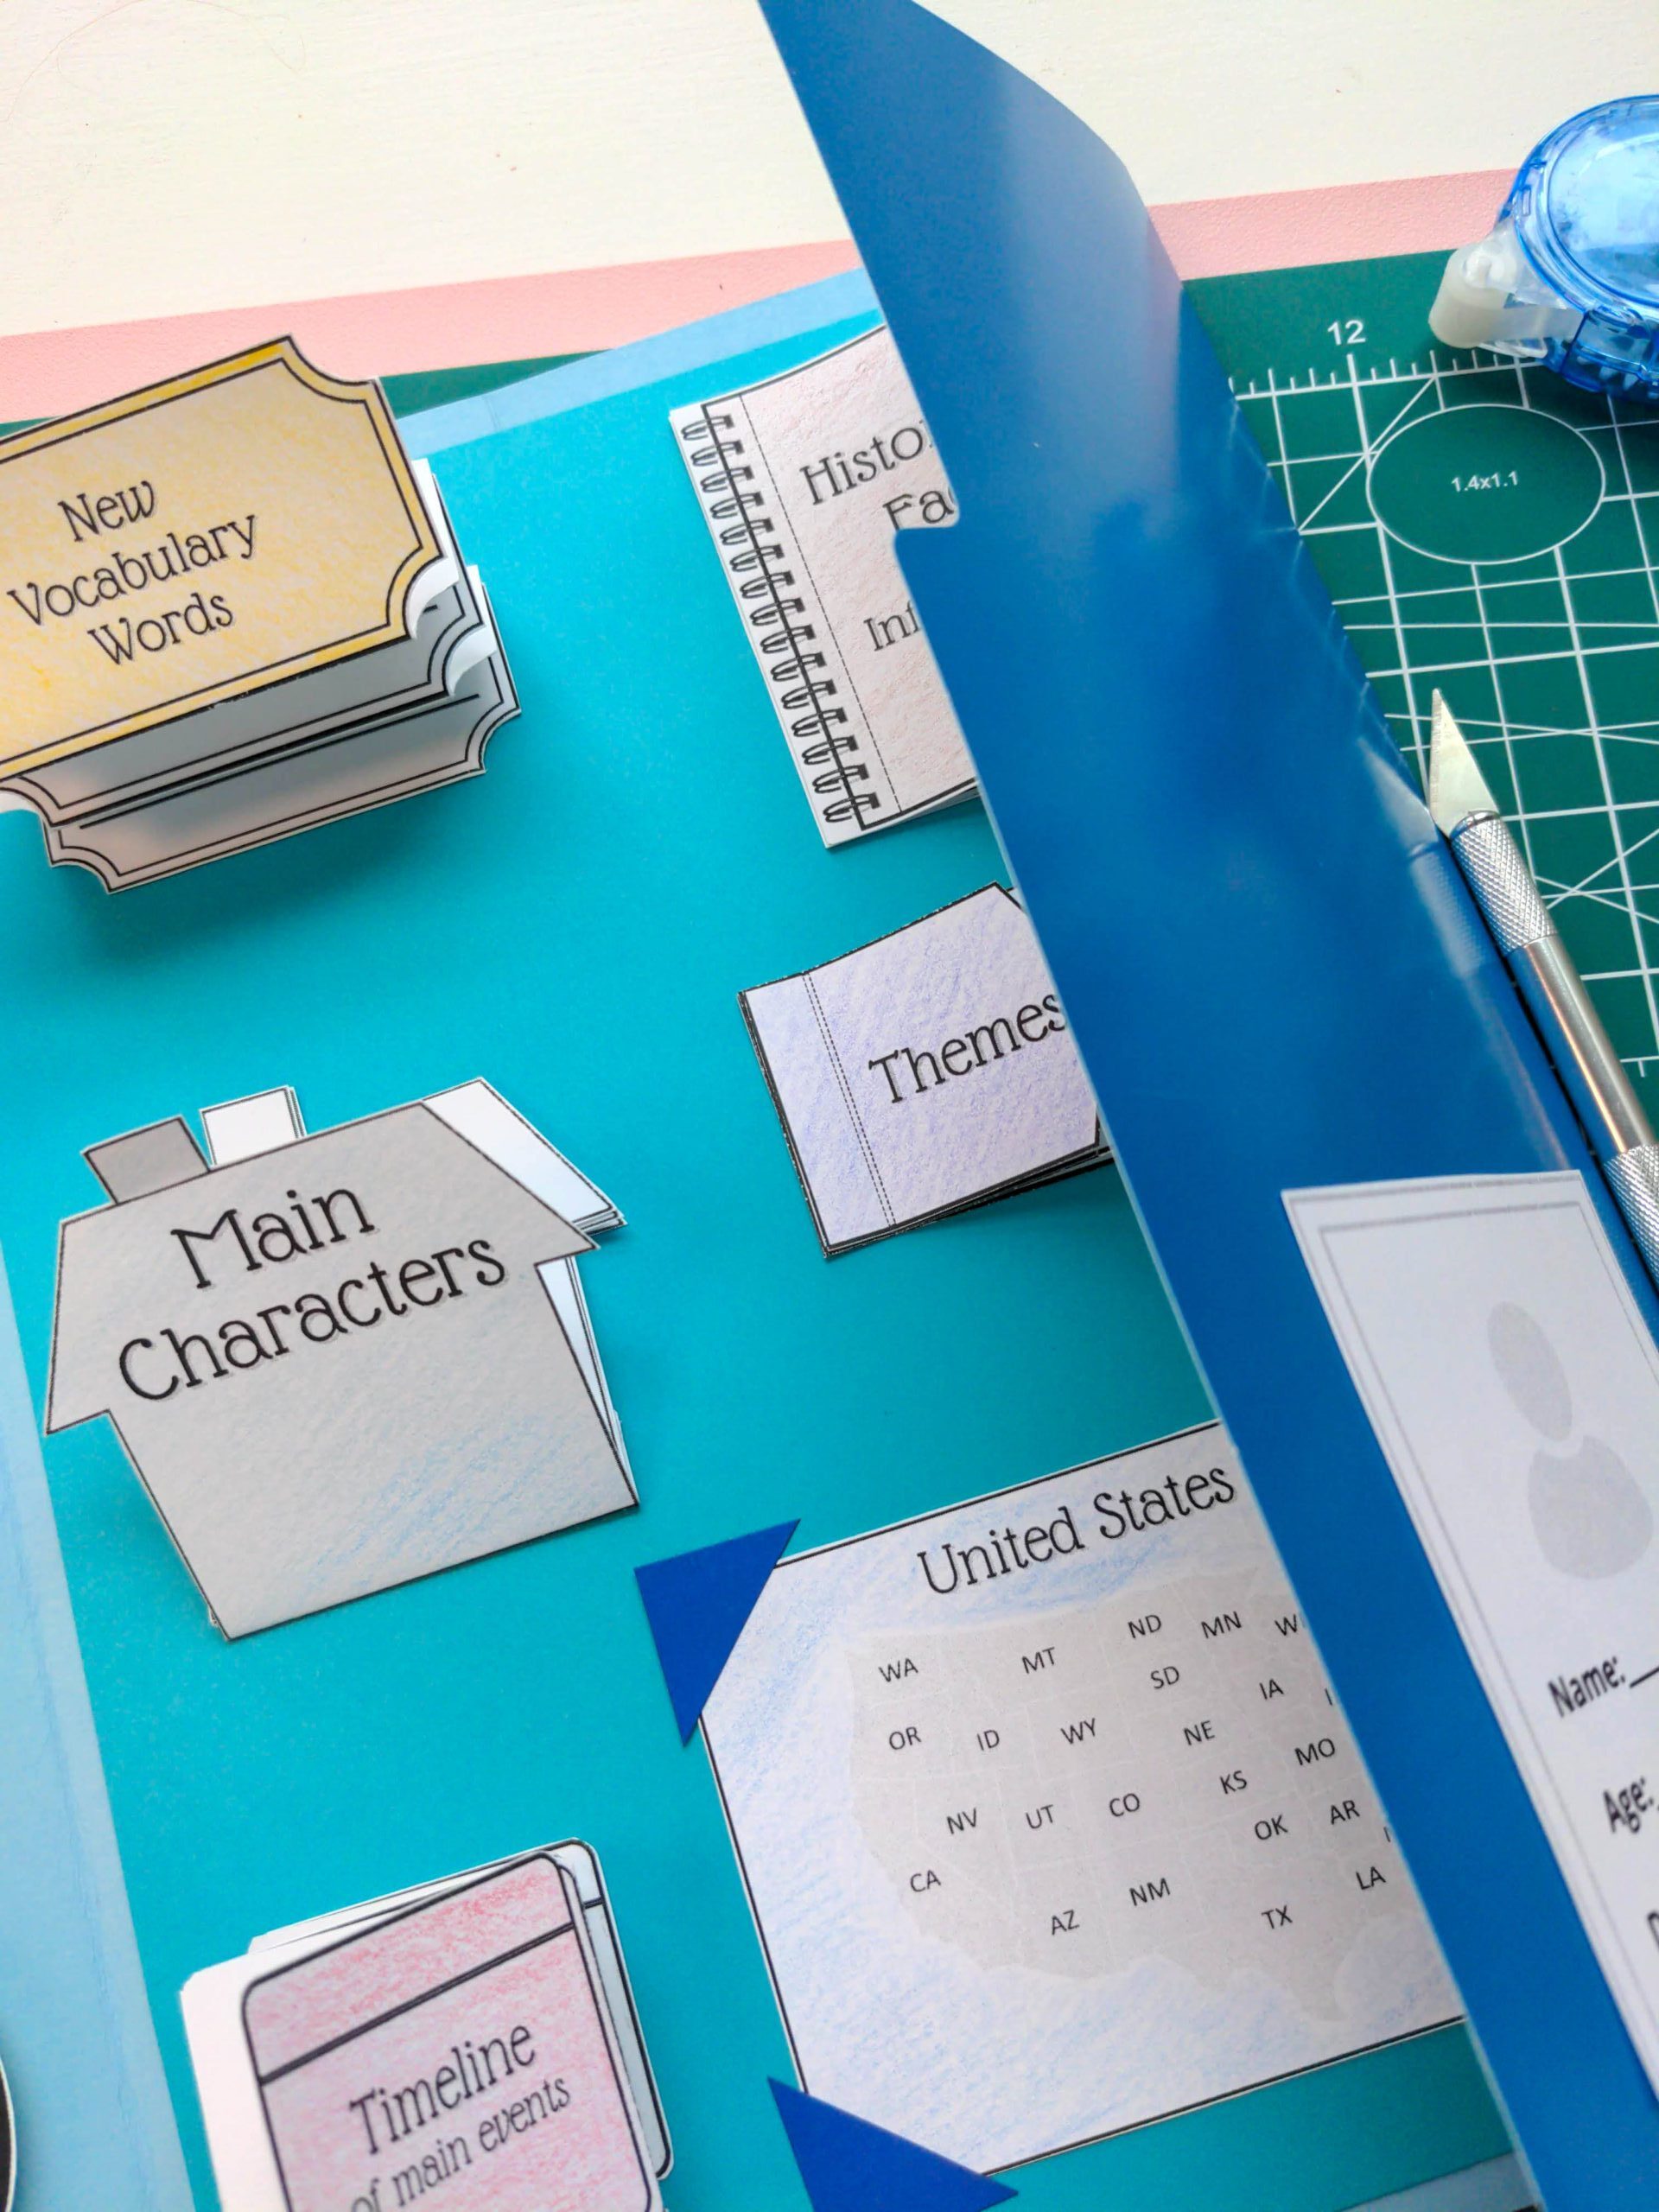
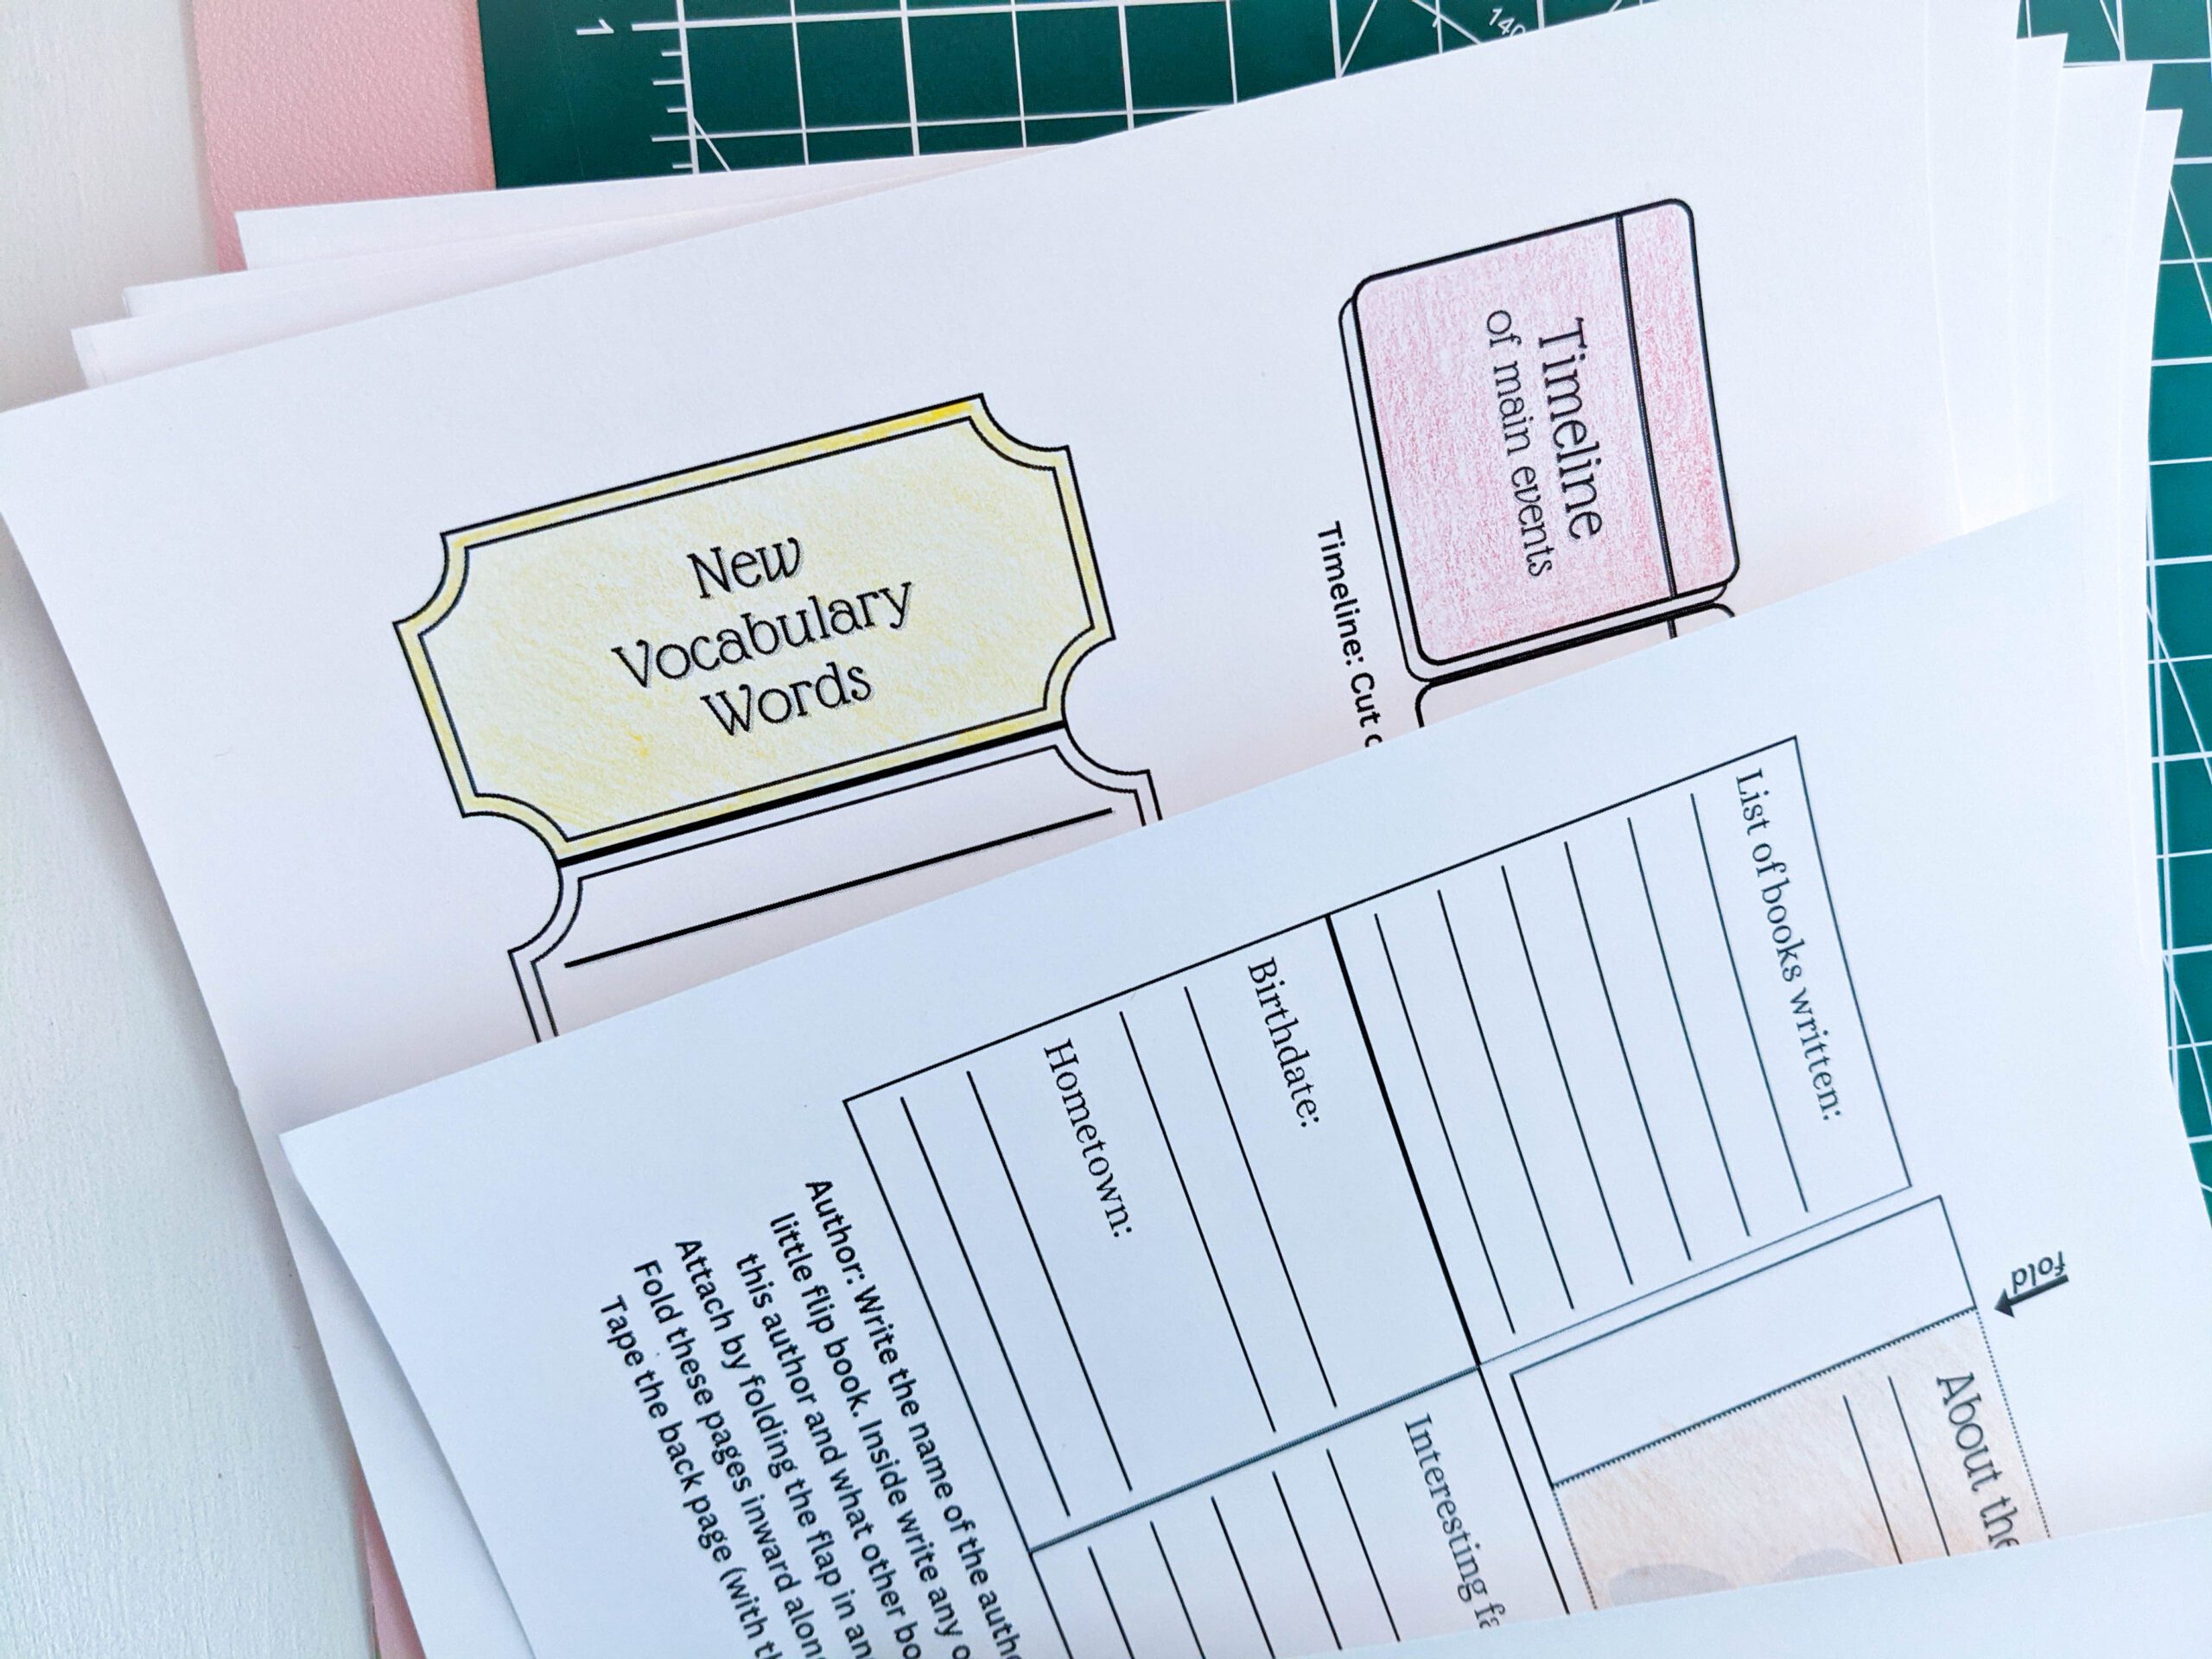
Elements of a lapbook
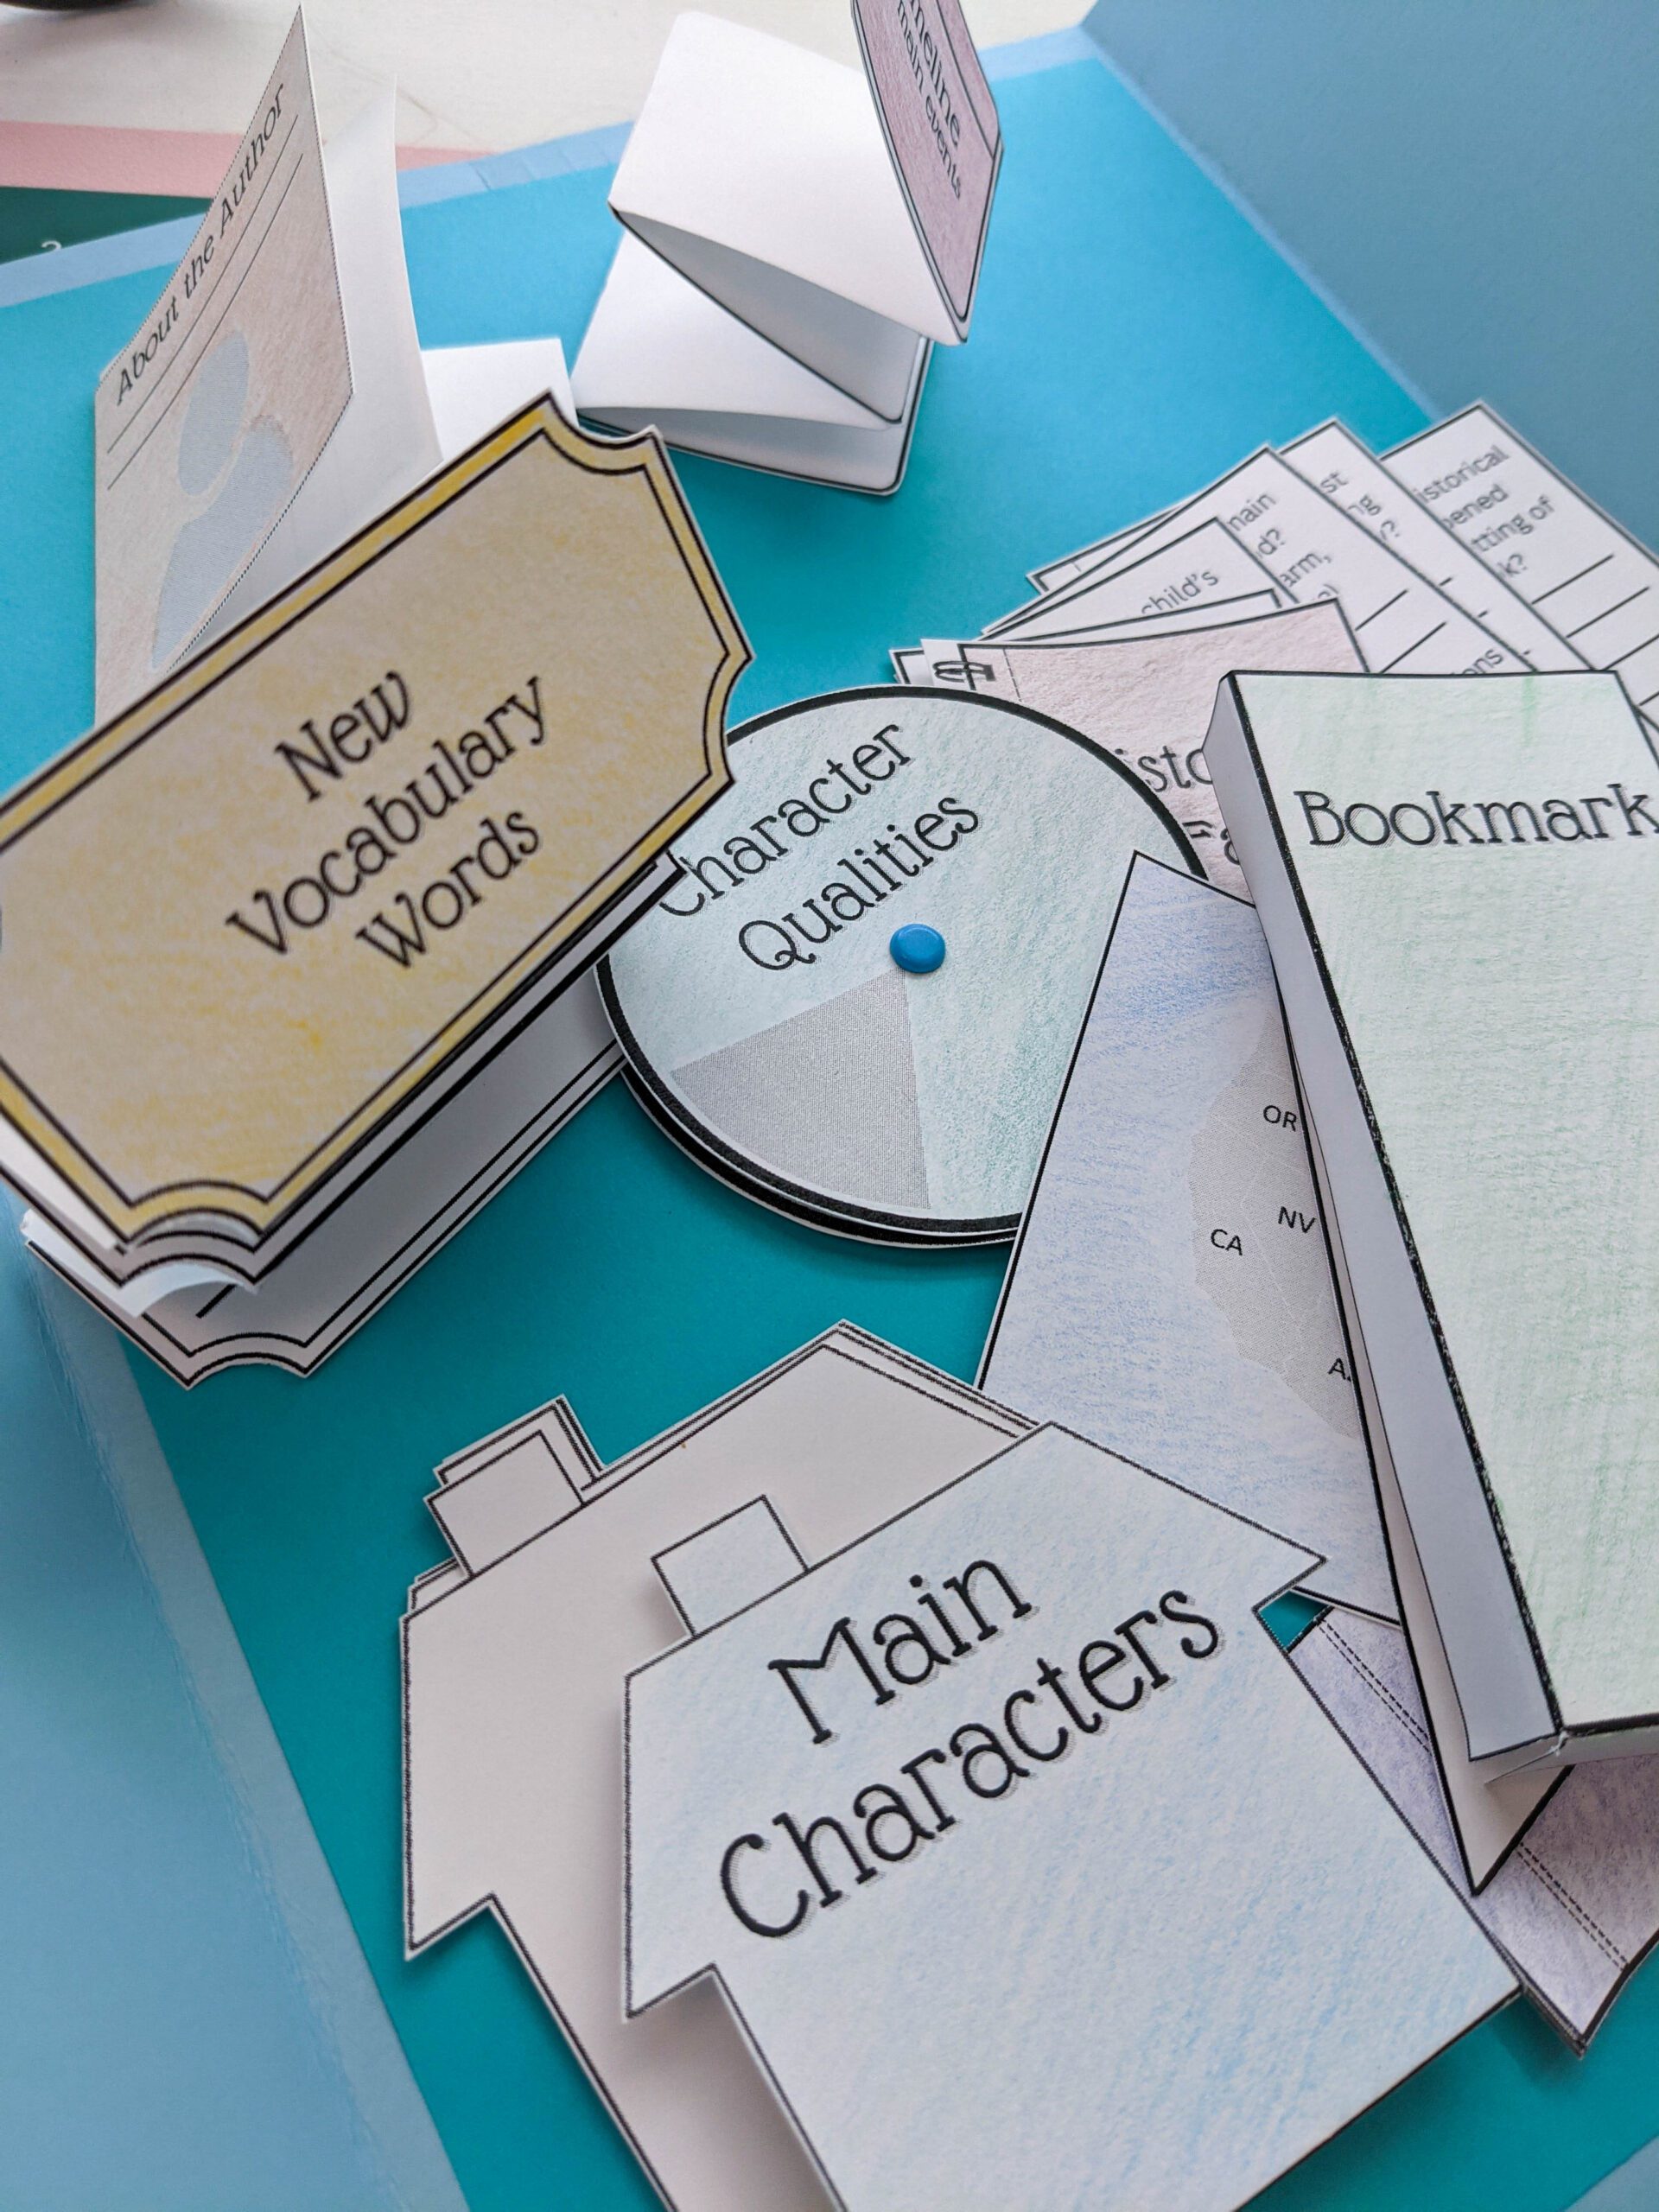
The main goal of an element is to display useful information in a fun and innovative way. With a wide variety of ways to do so, this is the absolute best part of a lapbook! Elements can be any shape and can fold, flip, pop up, spin, or tuck into a pocket! The creativity is endless!
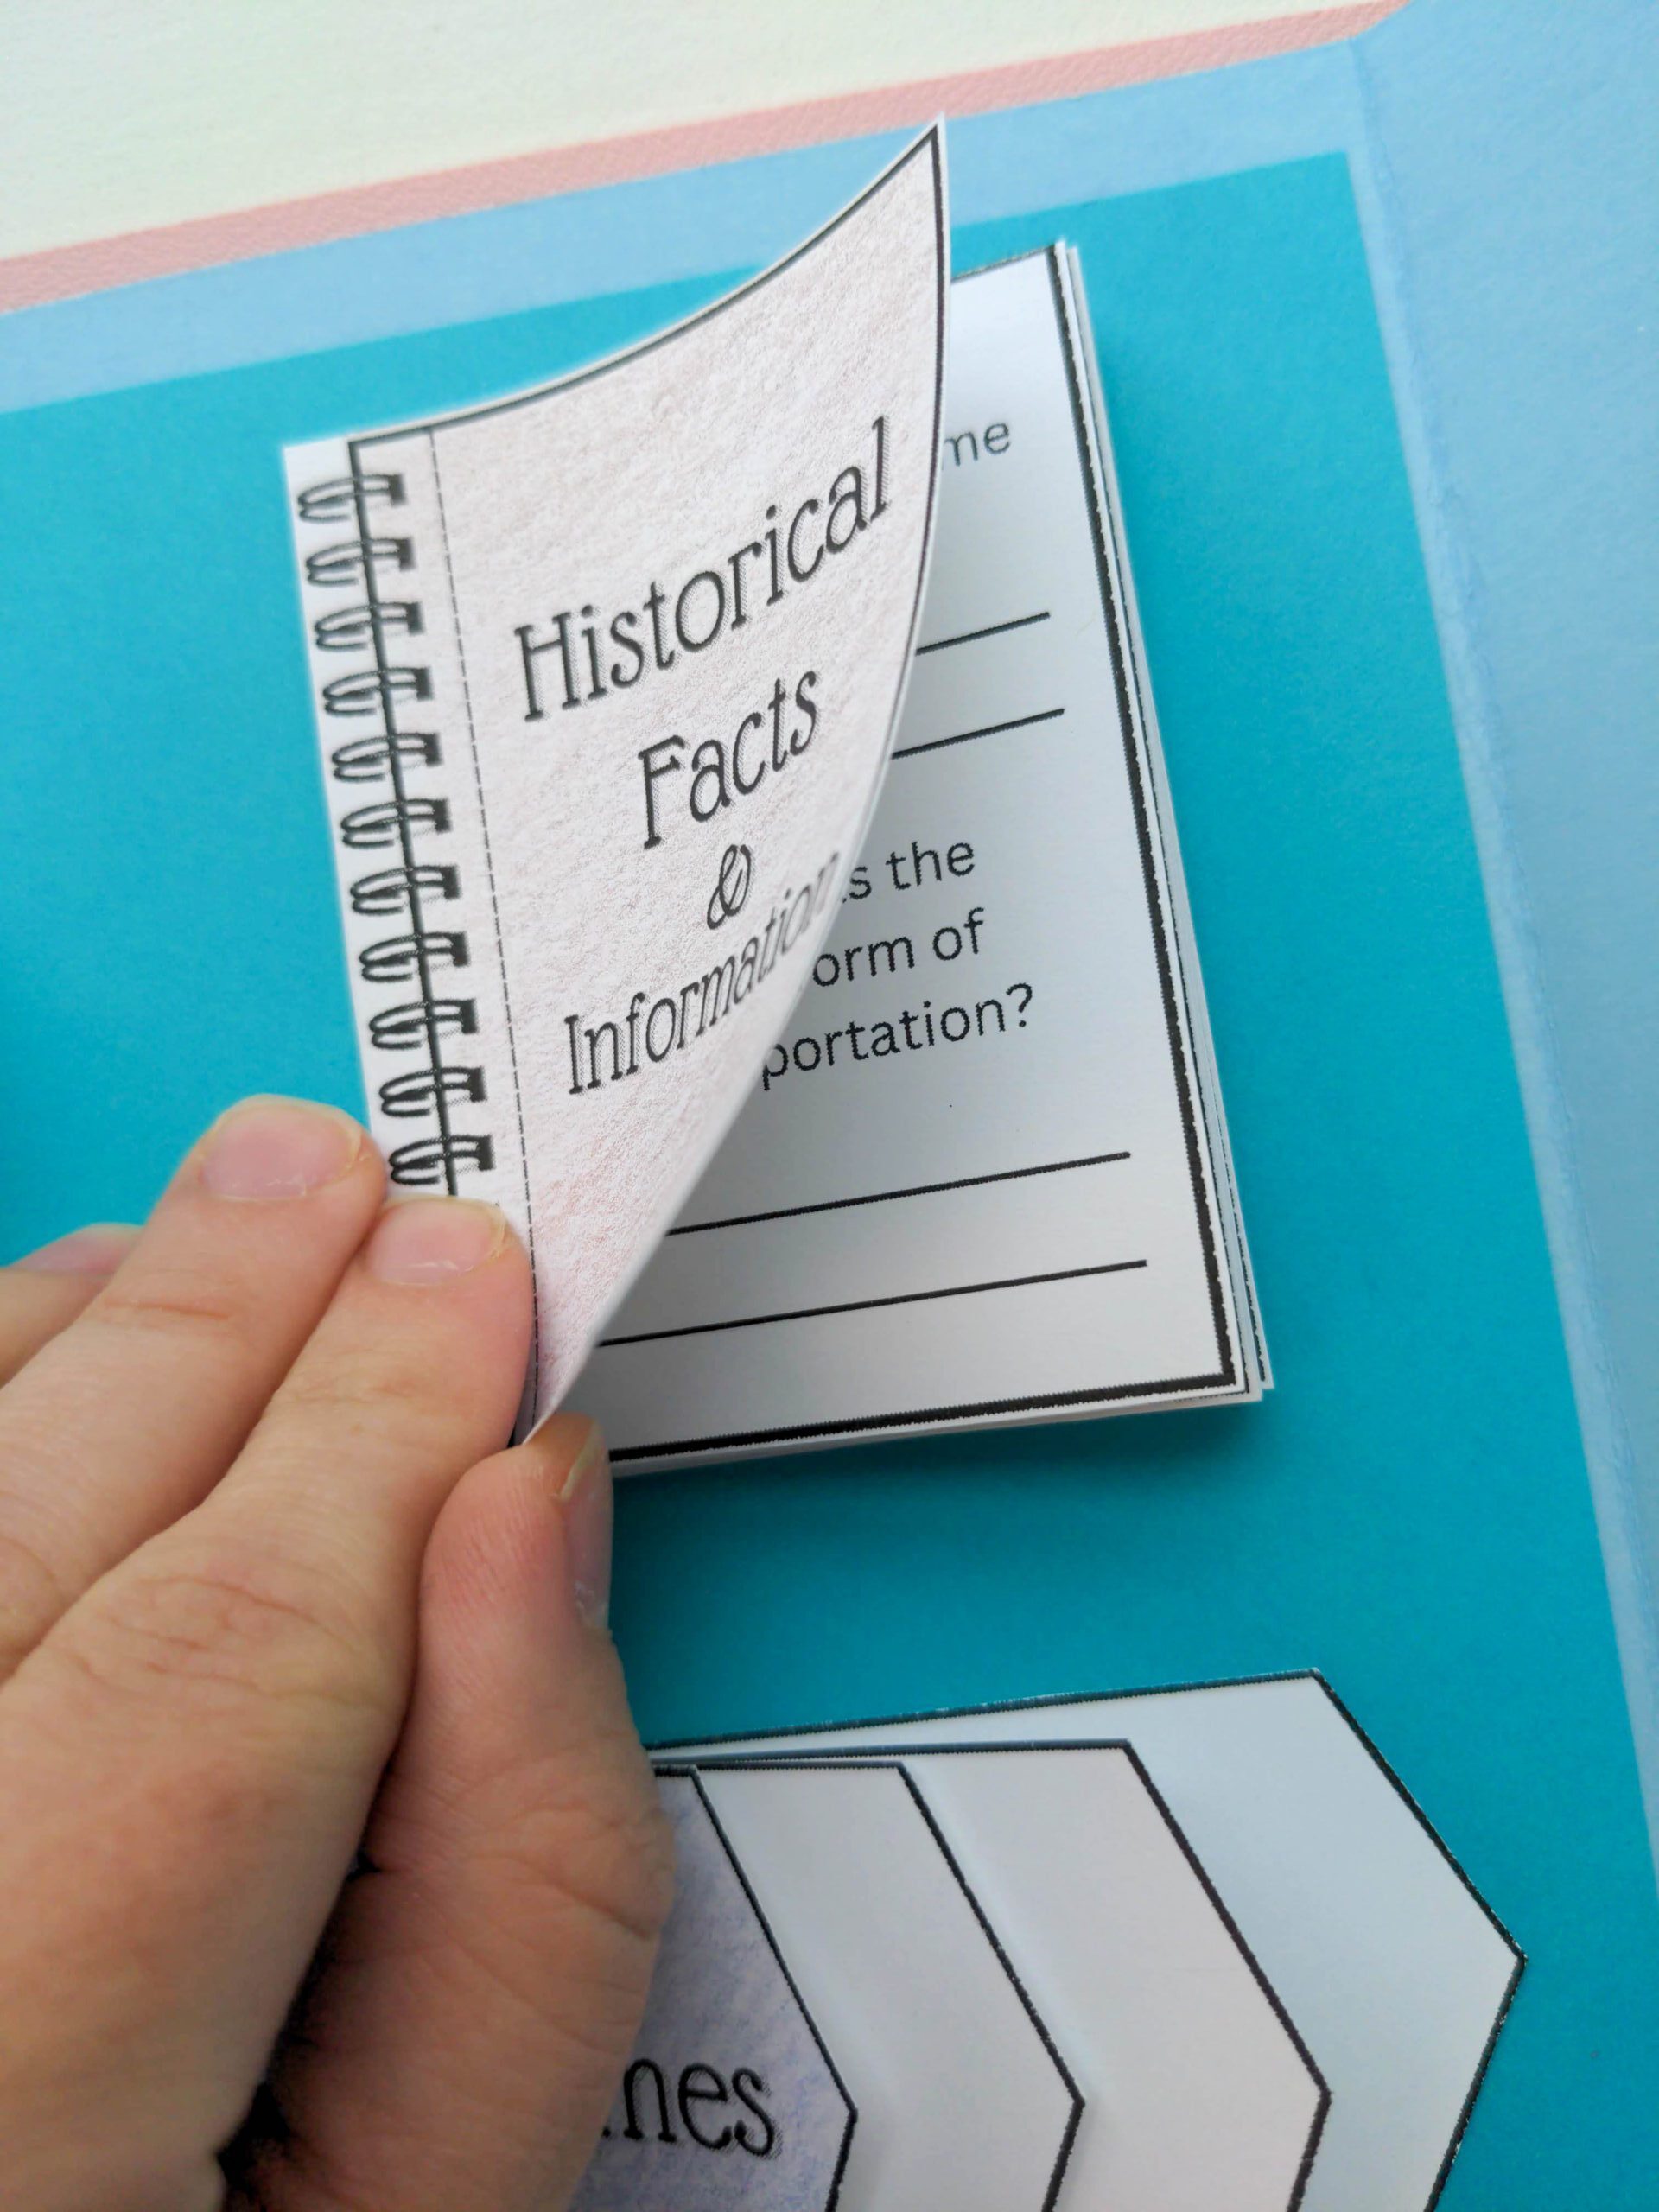
Mini books: Exactly as they sound, miniature books are just that. They are easy to make with a spine on the side or top that is taped or stapled together to open like a book. These are great to have cool facts written inside them!
Flip books: Little books that can be made to fold out, fold down, or fold up…these are the simplest ideas for an element. They can have multiple pages that can fold out in different directions.
Spinners: Add a 3d feature to your lapbook with spinners. These are a fun way to write a list of words or collect a list of favorite things.
Pockets: These are so much fun to add to lapbooks. A pocket can be a place to store a bookmark, a recipe card, or even pictures of something you discovered in your research!
Frames, doors, photo corners, etc: Just a few more fun things to add to your lapbook to give it a 3e effect. These elements are the finishing touches on your lapbook.
This is just a sample of the many element ideas there are to make! Putting them all together is the best part!
Creating a Lapbook
Here are the five main steps to creating a lapbook:
1. Collect your supplies
2. Decide on your topic – favorite book, historical figure, place, or subject
3. Make your lapbook base
4. Cut out, design, and create your elements
5. Put it all together!
Lapbook Kits
Creating a lapbook can seem overwhelming at first, but there are many lapbook kits and flip book ideas available. You will quickly find that they are so rewarding and easy to make! Children will have so much fun and be more engaged in their studies when they can see and create with the information they have been given.
I am excited to share here my lapbook kits now available in my shop! I have many pre-designed element kits available to download and ready to print. These kits are full of new ideas and ways to make learning exciting and engaging.
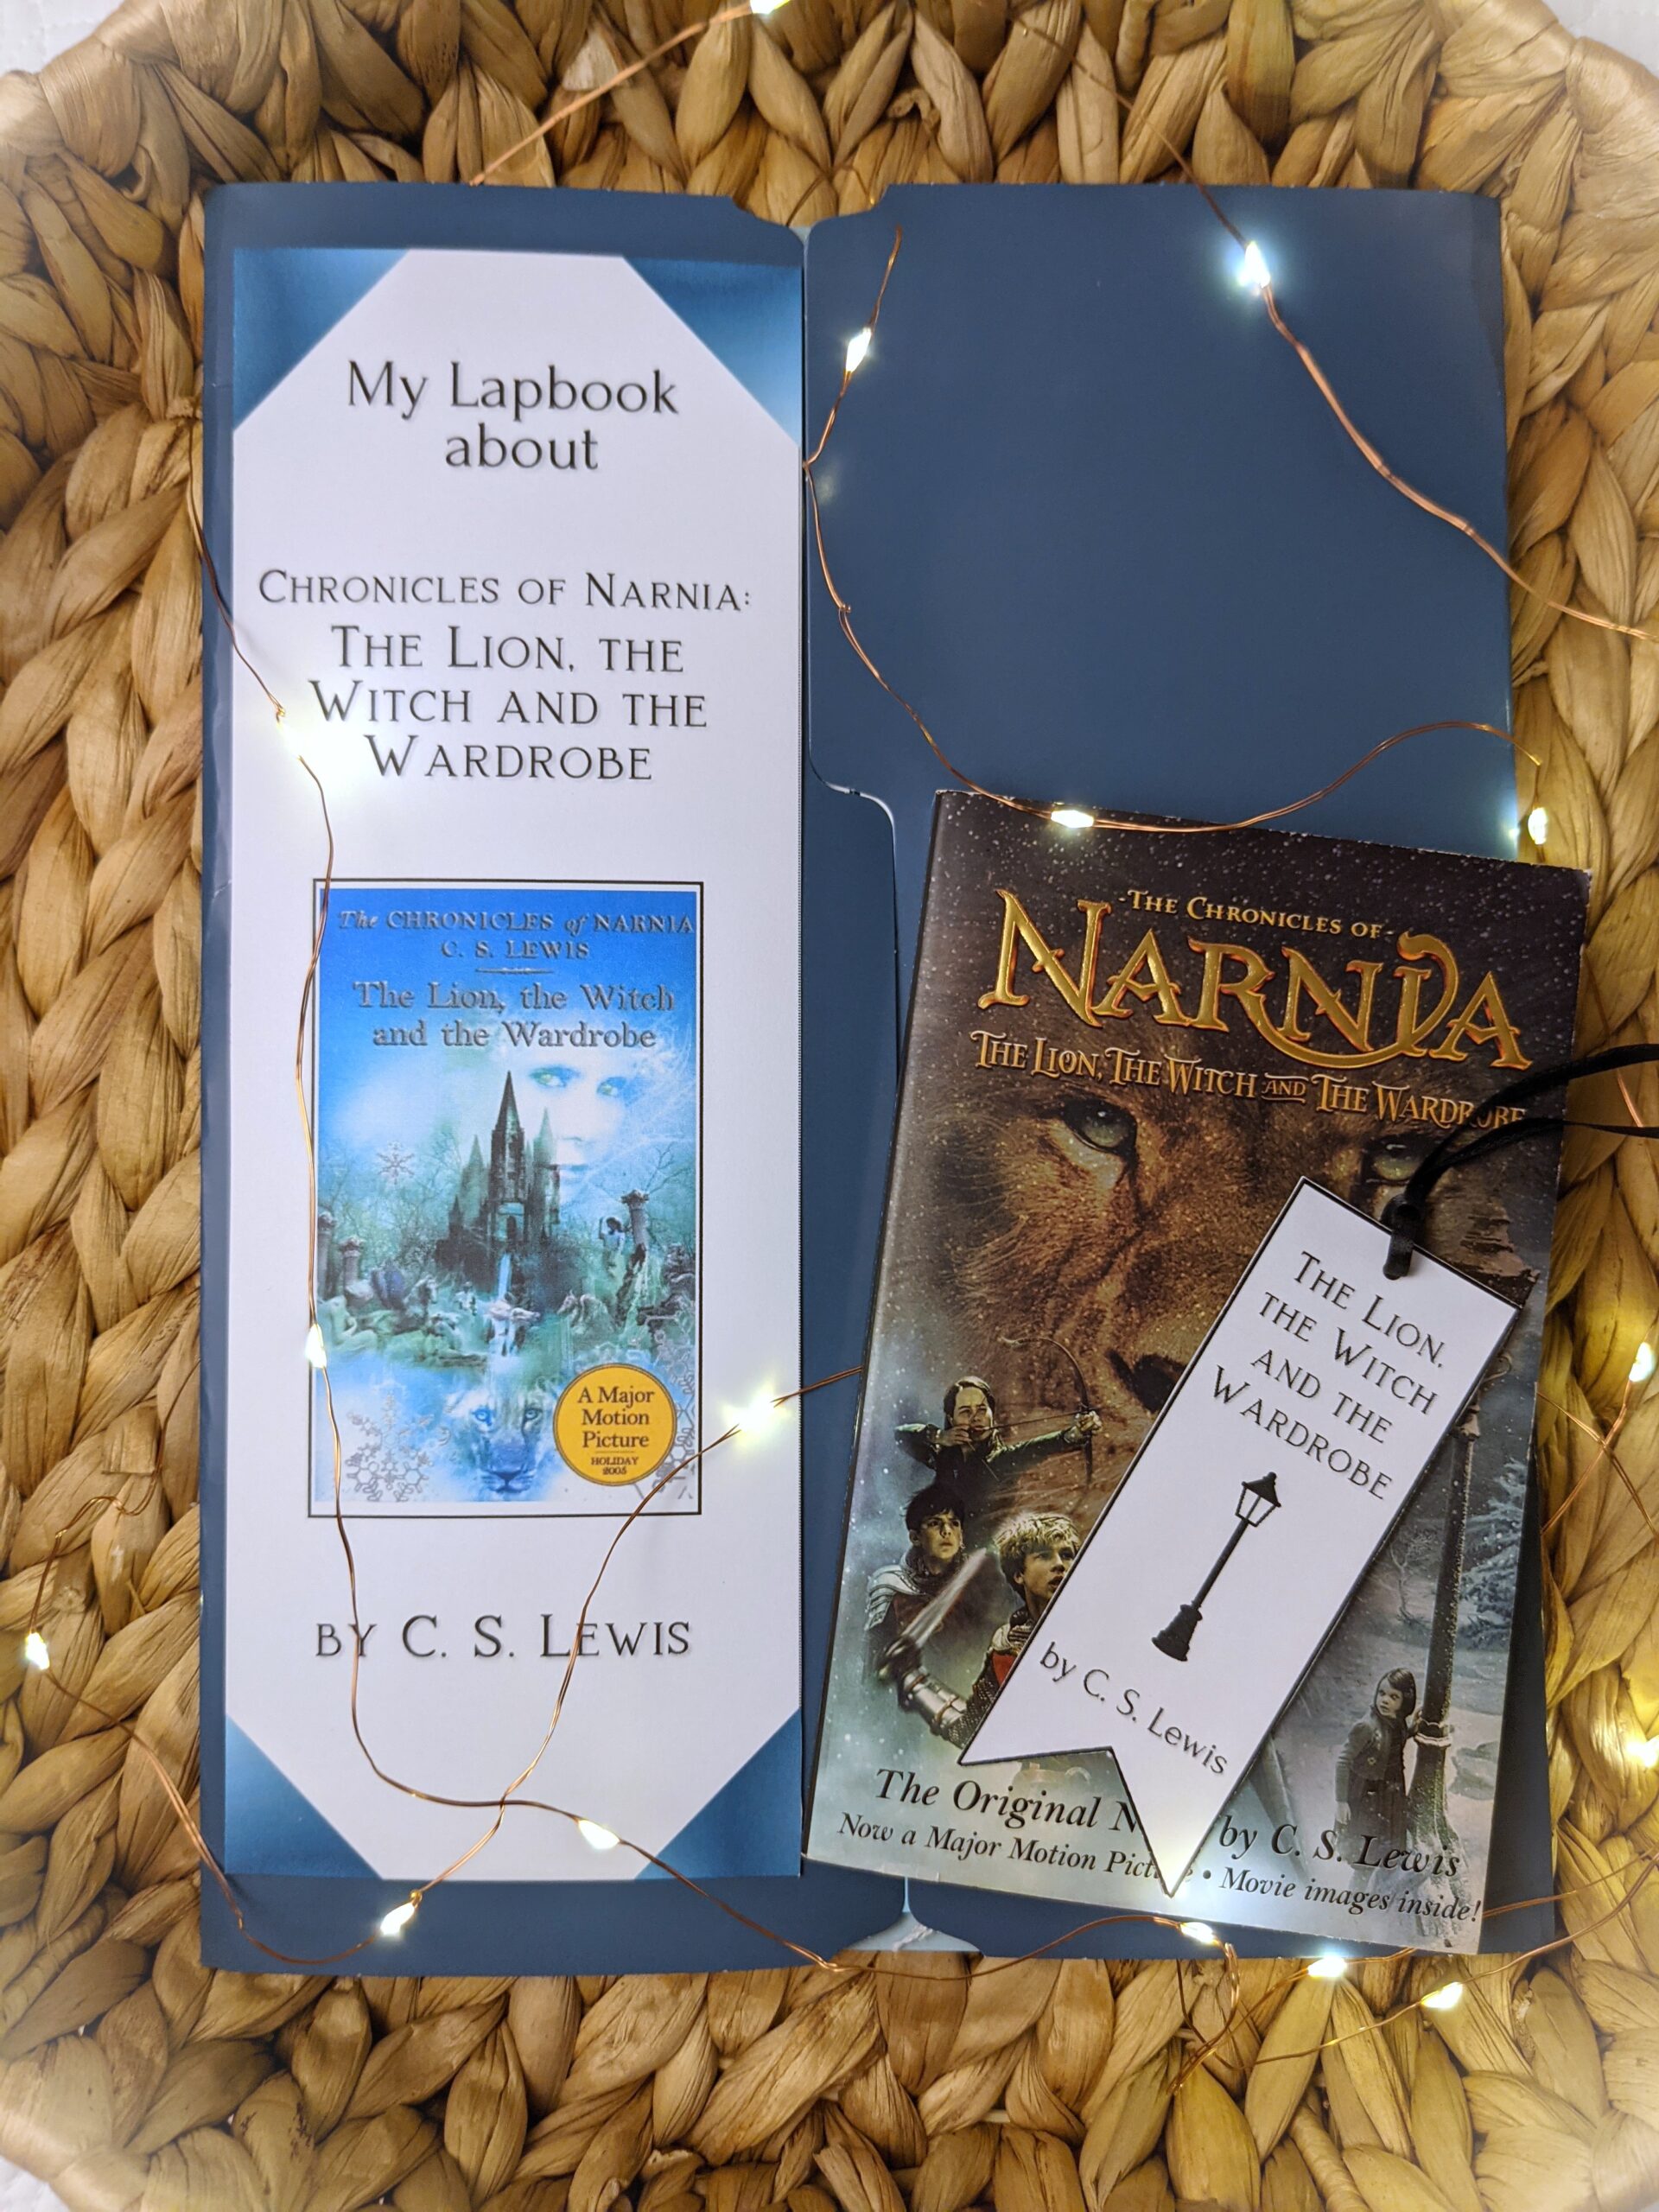
Making this lapbook will bring the story to life and promote reading comprehension. This kit enables children to learn more about the author, historical events related to the book, and explore character qualities and themes they encountered while reading the story.
Use these creative elements to craft a lapbook with your child that tells all about their life.
They will have fun talking about their favorite things, their family and friends, and so much more!
This lapbook kit is one-of-a-kind and sure to make you smile as you watch your child put it together.
This lapbook can be made by one child with the help of an adult. OR a family can work on it together as they read this book.
In this unique lapbook kit, you will find all brand new elements with details that are specific only to this book!
Storing Your Lapbooks
As your kiddos start creating and making these engaging lapbooks, finding a place to store them safely is necessary. I love finding decorative cardboard photo boxes as they are pretty and simple. Or you can simply use a plastic container like these that you can get from any craft store.
I like to store lapbooks laying flat so that all the elements can be pressed and no pieces get lost.
Also right after making a lapbook, it is best to close it and lay it under some heavy books so that the elements and the folds can flatten!
I hope you get excited about using lapbooks in your homeschool! I am so excited to do more of these with the kiddos and watch their creativity grow!
Let me know if you have heard of a lapbook and if you have every made some with your kiddos! If you have, let me know what subjects did you explore?
To find all my available lapbook kits, click here to visit my etsy shop!
We have become his poetry, a re-created people that will fulfill the destiny he has given each of us,
for we are joined to Jesus, the Anointed One.
Ephesians 2:10 TPT
Subscribe to my newsletter:
By submitting this form, you are consenting to receive marketing emails from: A Basketful of Joy. You can revoke your consent to receive emails at any time by using the SafeUnsubscribe® link, found at the bottom of every email. Emails are serviced by Constant Contact